
Views: 0 Author: Site Editor Publish Time: 2026-07-04 Origin: Site


Home renovations often focus on visible finishes, leaving the vital electrical network hidden behind drywall. Yet, poor wire management carries massive hidden risks. Without proper anchoring, wires face localized hot spots, jacket tearing, and immediate municipal inspection failures. We often overlook what happens behind the walls until a major issue arises.
Shifting from planning a wiring layout to mechanically securing it requires absolute precision. Loose wires strain junction boxes and rub against sharp studs. You must anchor these lines safely to prevent long-term hazards. It is not just about getting power to a room. It is about keeping your home safe for decades.
This guide provides a clear framework for evaluating and selecting code-compliant hardware. We will cover how to accommodate different substrate materials like wood, masonry, and drywall. You will also learn how to protect both high-voltage and low-voltage lines efficiently. Understanding these hardware choices ensures your project passes inspection seamlessly.
Selection of securing hardware must align with the specific cable type (e.g., NM-B/Romex vs. Cat6) to prevent jacket crushing and signal degradation.
Insulated staples and nail-in cable clips are the industry standard for wood framing, minimizing the risk of accidental shorts during installation.
Code compliance (such as NEC guidelines) dictates not just the type of fastener used, but the exact spacing and distance from junction boxes.
Separating low-voltage smart home wiring from line-voltage electrical requires specific, dedicated management products to prevent electromagnetic interference.
Successfully managing an electrical rough-in goes far beyond just running wires from a breaker panel to an outlet. Defining success in this phase means establishing complete mechanical stability. Proper securing prevents excessive strain on sensitive junction box terminals. When wires shift inside the wall, they can pull loose from their connection points. This creates dangerous arcing risks. Excellent wire management also avoids accidental jacket abrasion during the drywall installation process. Drywall screws easily pierce loose wires resting against the framing. Inspectors rigorously check these details to enforce rigid safety standards.
The consequences of failing an electrical inspection are severe. Imagine the frustration of completing your rough-in only to receive a red tag from the municipal inspector. The labor and material waste associated with tearing down newly hung drywall is monumental. You have to open the walls back up just to fix unsecured wiring. This delays the entire renovation schedule. It stalls painters, floor installers, and trim carpenters. Doing the job right the first time eliminates these massive setbacks. You protect your project timeline and reduce unnecessary headaches.
You might feel tempted to use whatever fasteners you have lying around. However, improvisation poses significant safety threats. Purpose-built hardware ensures permanent reliability. Generic zip ties, duct tape, or bent nails lack the structural integrity required for long-term in-wall use. Plastic zip ties become brittle over time and snap. Tapes lose their adhesive properties as home temperatures fluctuate. Standardizing your approach with verified Cable Fixing Products guarantees compliance. These specialized components distribute pressure evenly. They hold lines firmly without compromising the protective outer sheathing. Never compromise on permanent in-wall hardware.
Selecting the right hardware depends heavily on the specific application and framing materials present in your home. Let us explore the primary categories of fasteners used in modern residential wiring.
Cable staples serve as the backbone for traditional home wiring. You primarily use them for rough-in electrical runs across exposed wooden joists and wall studs. When dealing with standard non-metallic sheathed cables, insulated staples are strictly recommended. The plastic insulation guards the wire. If you strike the staple too hard with a hammer, the metal bridge will not slice into the Romex jacket. Over-hammering remains a frequent error during fast-paced installations. Non-insulated staples lack this protective buffer. Using insulated versions adds a critical layer of safety to your rough-in work.
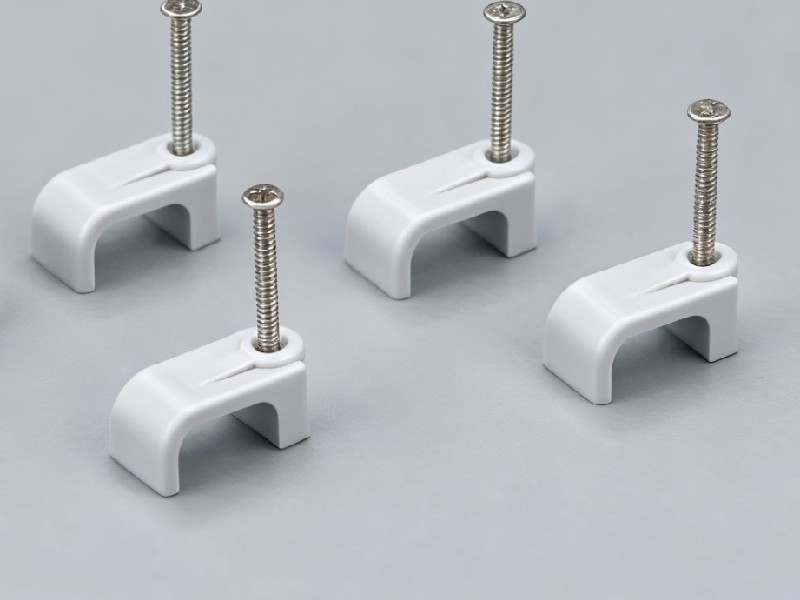
These components excel in environments where standard staples might cause damage. You use cable clips primarily for retrofit applications, exposed baseboard runs, or managing low-voltage lines along existing trim. They cradle the wire perfectly. When evaluating these options, assess the plastic durability. Polyethylene generally outperforms standard PVC in flexibility and impact resistance. You also need to verify the nail quality. Zinc-plated nails provide crucial rust resistance, especially in damp environments. These clips deliver excellent strain relief. They hold the line securely without pinching the internal conductors.
Basement renovations and exterior garage upgrades present unique challenges. Here, wiring often meets solid concrete or cinderblock. Standard nails simply bounce off these hardened surfaces. Masonry anchors and push-mount clamps fill this void perfectly. This hardware requires pre-drilling holes into the substrate with a masonry bit. Once drilled, the anchor taps into place, providing a rigid mounting point. If you install these outdoors, focus on products manufactured with UV-resistant nylon. Sunlight breaks down standard plastics quickly. You also want secure locking mechanisms to handle high-vibration areas.
The rise of smart homes introduces miles of data cabling into modern renovations. You use J-hooks for smart home retrofits, Cat6 Ethernet networking, and complex home theater wiring. Low-voltage cables possess delicate internal twisting. Standard staples crush these internal pairs easily. J-hooks must have wide surface areas to support the line gently. This prevents cable crimping entirely. Crimped data lines suffer from severe signal degradation and cross-talk. Smooth, wide support mechanisms preserve your network speeds and ensure reliable smart home performance.
Fastener Category | Primary Use Case | Key Evaluation Feature | Risk if Misapplied |
|---|---|---|---|
Insulated Staples | Wood studs and joist runs | Plastic buffer beneath the bridge | Jacket tearing from over-hammering |
Nail-In Clips | Retrofits and exposed trim | Zinc-plated nails, polyethylene body | Plastic shattering or nail rusting |
Masonry Anchors | Concrete, cinderblock, basements | UV-resistant nylon, locking strength | Hardware pulling out of the wall |
J-Hooks | Cat6, home theater, smart home | Wide, smooth resting surface | Data transmission speed loss |
Narrowing down your hardware choices requires careful consideration of several environmental and physical factors. Choosing the wrong fastener compromises the entire electrical layout. You must evaluate the specifications meticulously.
The fixing product must match the exact wire gauge you intend to run. Electrical cables come in specific dimensions, such as 14/2 or 12/2 AWG. Using oversized clips leads to noticeable sagging between studs. Sagging lines look unprofessional and can interfere with insulation batts. Conversely, undersized clips create severe problems. They cause jacket pinching as you force the cable into a tight space. This localized pressure compromises the insulation over time. Always check the manufacturer packaging to confirm the supported wire gauges.
You must evaluate the framing environment before purchasing supplies. Homes feature varied construction materials. Metal studs behave entirely differently than wooden framing. Metal studs require snap-in plastic bushings to protect wires from razor-sharp steel edges. You must also use specialized self-tapping screws for mounting hardware. Traditional wood studs easily accept standard staples and nails. If you encounter older lath and plaster walls, standard nails might shatter the plaster. Understanding your substrate determines the exact mounting mechanism you need.
Moisture ruins improper hardware rapidly. For damp environments like bathrooms, unfinished basements, or exterior walls, you must prioritize resilient materials. Standard steel rusts quickly when trapped behind moist shower walls. Prioritize stainless steel nails or heavy galvanized hardware. Industrial-grade polymers also mitigate corrosion risks over decades of enclosed use. You want materials that outlast the lifespan of the renovation itself. Protecting against hidden rust prevents future short circuits and structural deterioration.
Time management plays a crucial role in large gut renovations. You must evaluate the speed of application. Manual hammer-in hardware takes longer to install. When you have hundreds of feet to secure, fatigue sets in quickly. Consider staple gun compatible products. Specialized electrical staple guns shoot insulated fasteners accurately and consistently. This drastically improves your labor-time impact. Faster installation leaves more time for careful wire routing and final panel terminations. Efficiency keeps the overall project moving forward smoothly.
Even the best materials fail if applied incorrectly. Understanding the common pitfalls during installation saves you from catastrophic failures. We must look at the real-world risks associated with securing wires.
This remains the most common error for novices and DIY enthusiasts. They assume tighter is inherently better. However, over-tightening is incredibly dangerous. Explain the physics of a crushed jacket: when you smash the copper conductors together, you reduce the physical distance between them. You also deform the copper itself. This creates localized electrical resistance. Increased resistance generates heat. Continuous heat buildup inside an enclosed wall cavity poses an extreme fire hazard. Fasteners should hold the line snugly, never crush it.
Inspectors strictly enforce spacing guidelines. You cannot simply place fasteners wherever they look aesthetically pleasing. You must follow specific compliance metrics outlined by national standards. For traditional Romex wiring, you must secure the cable within 12 inches of every junction box, cabinet, or fitting. Furthermore, you must support the run every 4.5 feet along the framing. Skipping these intervals leaves wires vulnerable to sagging and shifting. Compliance here is non-negotiable. Missing a single staple can fail your entire rough-in inspection.
Installation Metric | Compliant Action | Violation / Risk |
|---|---|---|
Distance from Box | Fasten within 12 inches | Strain on terminal screws |
Run Spacing | Fasten every 4.5 feet | Sagging, drywall screw punctures |
Tension Level | Snug fit, jacket retains shape | Crushed jacket, high resistance |
Modern homes integrate both high-voltage power and low-voltage data networks. Mixing these two creates severe complications. You run a massive risk if you thread Cat6 data lines through the same pathways as high-voltage wiring. Alternating current creates an invisible electromagnetic field around the wire. If a data line runs parallel inside the same clip, this field causes severe electromagnetic interference (EMI). Your network speeds will plummet. Smart home devices will disconnect randomly. You must maintain physical separation between these dissimilar systems.
Chemical incompatibility destroys hardware silently. Using mismatched metal fasteners against specific sheathing causes galvanic corrosion. For example, pressure-treated lumber contains harsh copper-based chemicals to deter rot. Standard steel fasteners corrode rapidly when they contact treated wood. You must use hot-dipped galvanized or stainless steel anchors in these scenarios. Ignoring chemical reactions leads to fasteners dissolving completely over a few years. The wires then drop loose inside the wall, defeating the entire purpose of the installation.
Proper planning prevents mid-project supply runs. You need a structured approach to buying your hardware. Taking inventory early ensures you have the right pieces on hand when the walls are open.
Start by walking through the job site with a notepad. Categorize the needed hardware by room type. Bathrooms require moisture-resistant fasteners. Living rooms might require extensive low-voltage management. Note the framing material in each zone. Count the approximate number of junction boxes to estimate how many fasteners you need for the 12-inch rule. List the wire types being run. A thorough audit prevents you from guessing in the hardware aisle.
Do not buy a bulk bucket of clips blindly. We recommend purchasing small quantities of a few fastener types first. Take them back to the site. Test the gauge fit on scrap pieces of your actual cable. Try swinging a hammer in the tightest framing bays. Some bulky fasteners prove impossible to hammer into a narrow stud cavity. Testing a handful of samples reveals these physical limitations early. Once you verify compatibility and clearance, you can confidently order your bulk supplies.
Even if you handle the supply purchasing, you must align with the professionals doing the work. Advise your licensed electrician on the hardware you selected. Review your chosen fastener checklist together. Municipal codes vary wildly from county to county. An experienced local electrician knows exactly what the inspector wants to see. Ensuring local municipal code alignment prior to the rough-in phase prevents costly tear-outs. Collaboration bridges the gap between material selection and successful implementation.
Electrical securing components make up a tiny fraction of a percent of a total renovation budget. Yet, they represent a primary point of failure for both safety and code compliance. Ignoring this crucial step jeopardizes the entire structural integrity of your electrical system. Loose wires invite disastrous consequences behind finished drywall.
We highly recommend prioritizing insulated, gauge-specific hardware over generic multi-purpose fasteners. Test your materials before bulk ordering to ensure they fit your specific substrate and wire combinations. Collaborate closely with your local professionals to verify spacing and code adherence. By standardizing your wire management approach, you protect your home against hidden electrical faults for decades to come.
A: Standard guidelines generally require securing cables within 12 inches of a junction box, panel, or fitting. Additionally, you must support the cable every 4.5 feet along the framing run. Always check your local municipal codes, as regional inspectors may enforce stricter variations of these rules.
A: No. Standard plastic zip ties do not meet structural support codes for permanent line-voltage installations. They become brittle and snap over time. However, specialized, UL-listed nylon ties may have highly specific use cases when approved by a local inspector.
A: Over-tightening crushes the outer jacket and compresses the internal copper conductors. For electrical lines, this increases resistance, generates heat, and creates a severe fire risk. For data lines, crushing causes signal loss, cross-talk, and reduced network speeds.
A: Only if they are specifically UV-rated. Standard plastics degrade, become brittle, and shatter when exposed to direct sunlight. You must use UV-resistant clips—usually made of specialized black nylon—to prevent plastic degradation and eventual wire sagging outdoors.

