
Views: 0 Author: Site Editor Publish Time: 2026-10-13 Origin: Site


Are your hands exhausted from manually pulling hundreds of zip ties daily? Hand fatigue slows down your work, while sharp plastic edges create constant safety hazards. What should be a simple organizational task often turns into a grueling physical chore. A cable tie gun solves these problems instantly. It transforms how professionals handle high-volume wire management on the job site.
In this field-tested guide, we break down exactly how to operate this equipment efficiently. You will learn to dial in the perfect tension for delicate wires and maintain your gear for years of reliable, heavy-duty service.
A dedicated tensioning device automates the tightening and cutting process, saving massive amounts of time and preventing repetitive hand strain.
Properly adjusting the tension dial is critical to secure cables firmly without crushing internal wiring or causing data signal loss.
Pairing your tool with high-quality PA66 fasteners prevents unexpected snapping and ensures a durable hold across extreme environments.
The mechanism provides a perfectly flush cut, eliminating razor-sharp plastic burrs that cause workplace injuries and damage adjacent wires.
Routine maintenance, including cleaning and lubrication, dramatically extends equipment lifespan and guarantees consistent performance.
The electrical and IT infrastructure sectors are undergoing a massive transformation. Driven by the rapid expansion of hyperscale data centers and the intricate wiring demands of electric vehicles, manual cable routing simply cannot keep pace. Industry data shows a sharp decline in traditional plier-based fastening. Contractors now face strict quality control mandates. For instance, a single over-tightened tie can degrade a CAT6A signal, while a sharp burr can chafe through an EV wiring harness under heavy vibration.
Consequently, the industry is rapidly adopting semi-automated wiring tools. These devices standardize installation quality across massive project scales. Furthermore, they significantly lower workers' compensation claims related to repetitive strain injuries, making them an essential investment for modern contractors.
Often called a zip tie tensioner in the field, this specialized hand-held device streamlines the tedious process of securing wire bundles. Manual fastening relies entirely on a technician's grip strength, which inevitably yields inconsistent results. In contrast, a dedicated tool automates the critical final stages of tightening and cutting.
The core mechanics involve a precision internal gripping and ratcheting system. You insert the loose tail of a zip tie into the tool's nose. Inside, a hardened metal pawl bites into the plastic ridges. As you squeeze the trigger, the tool pulls the tail through the locking head. The tension increases smoothly and steadily. Once the pull force hits a pre-calibrated limit set by the operator, a built-in steel blade deploys automatically. This blade slices the excess plastic perfectly flush with the head.
Specifically, this mechanism is a game-changer for electricians, IT network installers, and assembly line workers. It guarantees extreme speed without sacrificing structural integrity or safety standards.
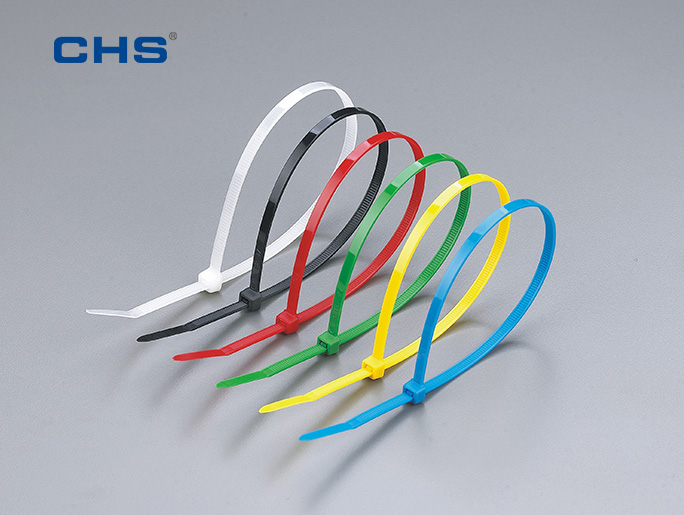
Basic pliers might work for a quick home repair. However, commercial project scales demand professional engineering solutions. Relying on manual methods for large installations is no longer a viable operational strategy.
Technicians frequently secure thousands of bundles per shift. Manually threading, yanking, and snipping each fastener creates massive production bottlenecks. Upgrading to a cable tie tensioning tool condenses a clumsy multi-step chore into one fluid trigger squeeze. This single motion slashes fastening time by up to 50 percent. Project managers can then reallocate labor resources effectively and hit tight deadlines faster.
Manual management requires relentless gripping and twisting. Over time, this mechanical stress damages tendons in the hand and wrist. Repetitive strain injuries like carpal tunnel syndrome are notorious in our trade, leading to costly worker downtime. Ergonomic tensioning tools absorb that mechanical stress. Their internal leverage means the operator applies minimal hand force to generate maximum clamping power.
Standard diagonal cutters almost always leave a tiny, razor-sharp burr on the tie head. In cramped server racks, these burrs slice open hands during routine maintenance. In heavy machinery, vibration causes these sharp edges to saw through adjacent wire insulation, leading to catastrophic short circuits. A professional tool severs the plastic entirely flush. The result is a smooth, safe surface every single time.
Human fatigue leads to inconsistent tension. Loose ties allow cables to sag, while over-tightened ties crush sensitive data lines. A tensioning device features an adjustable dial. It ensures every fastener on a massive cable run is tightened to the exact same specification, delivering a highly professional and uniform aesthetic.
Your equipment is only as reliable as the consumables fed into it. Running cheap, brittle plastics through a high-torque tool guarantees jammed gears and snapped ties.
To build a bulletproof system, match your tool's specifications to the exact job requirements. Standard industrial tensioning guns handle width ranges from 2.4mm up to 4.8mm. These dimensions are perfect for standard IT and electrical routing. For heavy-duty industrial applications requiring ties up to 9.0mm wide, you must specify a heavy-duty model. Forcing a massive tie into a standard tool will instantly strip the internal pawl.
Material quality dictates performance in the field. The mechanical pulling force exerted by the gun is intense. Therefore, seasoned engineers strictly specify industrial-grade nylon cable ties. Products molded from premium PA66 nylon offer exceptional tensile strength and flexibility. They survive the rapid mechanical shock of the tensioning process without micro-fracturing. Whether you are working in sub-zero freezers or scorching engine bays, PA66 ensures the hold remains secure for years.
Proper technique prevents hardware damage and protects the wire jackets. Follow this field-tested sequence for optimal results on the job site.
Never strap down tangled wires. Crisscrossed cables create bulky, uneven stress points that are difficult to secure. Use a cable comb to stroke the wires parallel. Group them logically by function. For example, physically separate high-voltage power lines from low-voltage data cables to eliminate electromagnetic interference.
Wrap the fastener around the organized bundle. Thread the tapered tail through the locking head. Pull it just snug enough to hold the wires together. Do not tighten it fully by hand. Leaving a little slack allows you to make micro-adjustments to the bundle's final position before permanent lockdown.
Hold the device comfortably in your dominant hand. Guide the excess tail into the open slot on the tool's nose. Push the gun forward until the nose sits completely flush against the square head of the tie. Keep the tool at a perfect 90-degree angle. Tilting it sideways will cause an uneven cut or bind the internal gears.
Squeeze the trigger smoothly. You might need two or three pumps depending on the remaining slack. The internal mechanism will pull the tail tight. Once it hits your specified tension limit, you will hear a sharp, satisfying click. The blade deploys and cleanly ejects the scrap tail. Release the trigger and move down the line.
Dialing in the right tension separates amateur work from professional engineering. If the hold is too loose, your installation falls apart over time. If it is too tight, you destroy the very cables you are trying to protect. Understanding tension calibration ensures structural integrity without compromising performance.
Most professional units feature a numbered dial at the handle base, typically ranging from 1 to 5. Lower numbers trigger the blade with minimal pulling force. Higher numbers demand massive torque before cutting.
Low settings like 1 or 2 are mandatory for fragile lines. Fiber optics, Category 6 data cables, and thin coaxial lines are highly sensitive to compression. Crushing a data cable alters the twisted pair geometry inside the jacket. This triggers alien crosstalk and massive data packet loss. A low setting secures the bundle gently and cuts the tail before any jacket deformation occurs.
In contrast, settings 4 or 5 tackle heavy commercial loads. Thick power conduits, automotive hoses, and rigid PVC demand high holding power. Loose ties in these high-vibration environments cause dangerous chafing. Maximum tension locks these rigid components down permanently.
Always run a scrap test before starting the main project. Zip two scrap wires together at your chosen setting. If the tie slides easily, increase the tension. If the jacket pinches or turns white, dial it back immediately.
Cable Type and Application | Recommended Tension Setting | Potential Risk of Over-Tensioning |
|---|---|---|
Fiber Optic Cables | Low Setting 1 | Micro-bending, severe signal loss, core fracture |
Ethernet and Data Lines | Low to Medium Settings 1 to 2 | Crosstalk, impedance mismatch, data packet loss |
Standard Electrical Wire | Medium Setting 3 | Jacket tearing, long-term insulation degradation |
Automotive Hoses and Tubing | High Setting 4 | Fluid restriction, permanent tube deformation |
Heavy Power Cables and Conduits | Maximum Setting 5 | Minimal risk; requires maximum stability |
Mastering the tool is just the baseline. True professionals apply strict routing standards to create a clean, maintainable infrastructure.
Spacing dictates structural integrity. Place a tie every 6 to 12 inches on straight runs. Highly flexible wires need 6-inch spacing to prevent unsightly sagging. Stiff power cables can stretch to 12 inches. When navigating a 90-degree bend, place one fastener right before the curve and one immediately after. This locks in the proper bend radius.
Aesthetics matter immensely in server rooms and control panels. Before pulling the trigger, manually rotate the tie head to the back or bottom of the bundle. Hiding the locking heads creates a sleek, uninterrupted look. It also prevents maintenance crews from snagging their sleeves in tight spaces later on.
Finally, never pull a cable run drum-tight from end to end. Always engineer a small service loop near termination panels. If a building shifts or a connector requires re-termination, that extra slack saves you from ripping out the entire wire run.
Even premium automated equipment fails if used incorrectly. Avoid these frequent field errors to ensure top-tier performance.
Feeding oversized fasteners is the primary cause of jammed tools. A tail that is too wide binds against the pulling gears. This bends the cutting blade or strips the ratchet entirely. Always cross-reference your tie width with the capacity limits printed on the tool's packaging.
Another major mistake is the pull-away reflex. Operators used to manual pliers often yank the tool backward while pulling the trigger. This premature motion tears the plastic instead of slicing it cleanly. It ruins the flush cut and leaves a dangerous jagged edge. Keep the nose pressed dead-flat against the head until the cut is completely finished.
Industrial hand tools require basic upkeep to survive harsh job sites. Neglect inevitably leads to slipping jaws and dull cuts.
Every flush cut generates microscopic plastic dust. Over weeks of heavy use, this debris packs into the gripping jaws and trigger housing. The jaws eventually lose their bite, causing the tail to slip during tensioning. Blast the nose cavity with compressed air after every large project. For compacted residue, scrub the internal teeth with a stiff nylon brush and a drop of isopropyl alcohol.
Friction destroys mechanical parts. The internal pivots and springs need light lubrication to maintain a crisp trigger pull. Apply a single drop of dry PTFE lubricant every few months. Strictly avoid heavy greases. Grease acts like a magnet for plastic shavings, creating a thick sludge that jams the mechanism completely.
Remember that the steel blade is a consumable wear item. When the tool starts leaving frayed edges or requires noticeably more hand force, the blade is dull. High-quality professional models feature easily replaceable blades, allowing you to restore factory-sharp cuts in minutes.
Integrating an automated tensioning device into your workflow completely redefines your wire management process. It drastically cuts installation time while safeguarding your hands from crippling repetitive strain injuries. By mastering the tension dial, you protect fragile data lines and ensure every bundle passes strict quality inspections.
For truly professional results, pair your hardware with premium PA66 nylon consumables. Keep your gear clean and lubricated to guarantee a long lifespan. If you are ready to eliminate hand fatigue and standardize your installations, explore the full range of high-performance solutions from CHS Plastics to find the exact tools and fasteners your next commercial project demands.
Yes. Once the pre-set tension threshold is reached, the internal mechanism automatically engages the built-in blade. It severs the excess tail completely flush with the head, leaving no sharp edges behind.
No, you absolutely cannot. You must use a specialized stainless steel tensioning tool. Inserting rigid metal ties into a standard plastic or nylon tie gun will instantly ruin the cutting blade and permanently strip the internal gripping gears.
Jamming typically occurs for two main reasons. Either the inserted ties are too wide for the tool's specific jaw capacity, or the internal gripping mechanism has become heavily clogged with plastic dust and debris. This requires immediate cleaning and lubrication.
Standard pliers require manual pulling and twisting. This relies entirely on guesswork for tension and always leaves a sharp, dangerous plastic burr. A specialized tensioning tool tightens the bundle to an exact, repeatable pressure and automatically delivers a perfectly smooth, flush cut.
Always match the tension to the fragility of the cable. Use low settings for sensitive data lines and fiber optics to prevent crushing the internal wires. Use high settings for heavy power cables and rigid automotive hoses that require maximum holding power against vibration.
When used correctly, the risk is virtually zero. The cutting blade is housed safely inside the nose of the tool and only engages the plastic tail of the zip tie. However, if you set the tension dial too high for delicate wires, the extreme pressure of the tie itself can crush and damage the wire jacket.

