
Views: 0 Author: Site Editor Publish Time: 2026-10-25 Origin: Site


Choosing the wrong sleeve for an electrical project quickly turns a minor inconvenience into a critical safety hazard. Imagine spending hours meticulously soldering a complex wiring harness. You apply heat. Suddenly, the tubing splits down the middle. Or worse, it slides loosely over the joint. While heat shrink tubing remains the ultimate solution for electrical insulation and environmental sealing, its effectiveness relies entirely on selecting the exact specifications for your specific application. This comprehensive guide demystifies expanded diameters, recovered sizes, shrink ratios, and wall thicknesses. You will learn how to choose the perfect materials with absolute confidence.
Key Takeaways:
Expanded vs. Recovered: Always measure your cable's largest diameter to ensure the tubing fits over it initially. Then, measure its smallest diameter to guarantee a tight seal after heating.
The 80/20 Rule: For optimal performance, tubing should be shrunk by at least 20 percent but no more than 80 percent of its maximum shrink capacity.
Shrink Ratios Matter: A standard 2:1 ratio shrinks to half its original size. A 4:1 ratio is purpose-built for sliding over bulky connectors and sealing tightly around much thinner wires.
Wall Thickness Dictates Durability: Thin-wall variants offer excellent flexibility for tight spaces. Heavy-wall or adhesive-lined options are mandatory for rugged, waterproof environments.
Think of it as a polymer with a thermal memory. Manufacturers mechanically expand a cross-linked plastic tube. When you apply heat, it snaps back. Field engineers and technicians rely on these sleeves to insulate bare wires and provide robust abrasion resistance. They also create reliable environmental seals for both solid and stranded conductors. Once heated, the material shrinks back to its original extruded dimensions, gripping whatever lies beneath it tightly.
Precision is non-negotiable in electrical safety. Guessing dimensions often leads to catastrophic mechanical stress on spliced joints. A sleeve that is too large fails to form a proper seal. Moisture seeps in, and the tube slides freely along the wire. Conversely, forcing an undersized tube over a large connector inevitably causes tearing. The walls distribute unevenly during the heating process, creating dangerous weak points.
This metric represents the minimum inner diameter of the tubing as it is shipped to you, before any heat is applied. In practice, your tubing’s expanded diameter must be at least 10 to 20 percent larger than the widest part of the object it needs to cover. Whether you are sliding it over a USB head, a bulky terminal lug, or an inline splice, this extra clearance prevents the material from snagging or tearing during installation.
Once the heat gun has done its job, the tubing reaches its recovered diameter. This is the maximum inner diameter after it is fully shrunk. To achieve adequate cable protection, this measurement must be noticeably smaller than the underlying wire. If the recovered diameter matches or exceeds the wire's thickness, the fit will remain loose. A loose fit offers zero strain relief.
Industry veterans swear by the 80/20 rule to maintain structural integrity. You should never shrink a tube less than 20 percent or more than 80 percent of its total available shrink capacity. Shrinking it too little means the tube hasn't fully engaged its compressive force, leading to a weak grip. Pushing it to its absolute maximum limit often exacerbates longitudinal shrinkage. The tube becomes noticeably shorter in length, and the walls thin out dangerously.
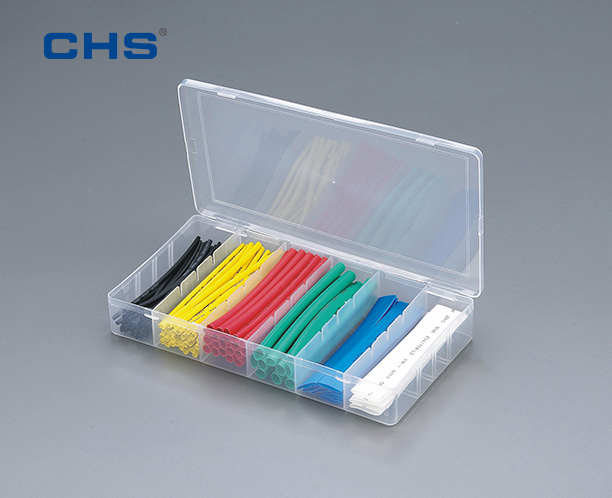
The shrink ratio is simply the mathematical comparison of the expanded diameter to the recovered diameter. It tells you exactly how much smaller the tube will get once activated by heat. Understanding this ratio is the key to navigating complex wiring scenarios on the job site.
A standard 2:1 ratio shrinks to exactly half of its original size. This is the go-to specification for basic wire insulation where the conductor and the connector are relatively similar in girth. Moving up, a 3:1 ratio reduces to one-third of its supplied diameter. This makes it highly effective for covering irregular shapes or inline components like resistors.
For extreme disparities, you will need a 4:1 or even 6:1 ratio. Imagine threading a sleeve over a massive 12mm automotive connector just to seal a tiny 3mm wire. These high-ratio tubes provide immense clearance during the initial slide. Furthermore, they still guarantee a vice-like grip on the smallest part of the assembly.
Your operating environment dictates the physical bulk of the material you need. Thin-wall tubing offers maximum flexibility and clarity. It is the preferred choice for crowded indoor electronics, custom PC builds, and tight enclosures. However, out in the field, conditions change. If your wiring will be exposed to physical friction, rocky soil, or heavy machinery, medium and heavy-wall tubings are mandatory. Their thicker profiles provide superior defense against cutting, scraping, and blunt impact.
Standard single-wall tubing is excellent for basic insulation, but it is not waterproof. Dual-wall tubing, often referred to as adhesive-lined tubing, features an inner layer of thermoplastic glue. As the outer jacket shrinks, the inner adhesive melts. It flows into every microscopic void between the wire and the connector. Upon cooling, it hardens into a rigid, watertight, and airtight seal. This barrier becomes impervious to corrosive fluids and harsh weather.
Polyolefin stands as the undisputed industry standard for most general-purpose and industrial applications. It boasts exceptional thermal stability, high flame retardance, and excellent resistance to common chemicals. Available in sizes ranging from 1mm up to 150mm, it is highly versatile. It handles extreme temperature fluctuations with ease.
In contrast, high-quality PVC heat shrink tubing brings unique, highly sought-after advantages to the table. Professional-grade PVC variants, like the DRS series, offer exceptional flame retardance meeting VW-1 standards and can handle continuous operating temperatures up to 105°C. PVC requires lower shrink temperatures. This minimizes the risk of heat damage to sensitive internal components. Furthermore, PVC can be manufactured to be crystal clear. It is the perfect choice for protecting wire labels and printed identification tags without sacrificing readability. It also tends to be more rigid post-shrinkage, offering excellent localized physical support.
For aerospace, military, or chemical manufacturing sectors, specialty materials like Teflon or elastomeric rubbers are utilized. These high-end polymers withstand punishing environments. They survive exposure to aviation fuels, extreme mechanical abrasion, and operating temperatures exceeding 200°C.
Recent industry analysis highlights a massive surge in demand for high-performance shrinkable materials. The rapid expansion of the Electric Vehicle market and renewable energy infrastructure drives this shift. As power grids become smarter, automotive wiring harnesses grow increasingly complex. Engineers now face much stricter safety regulations regarding dielectric strength.
Specifically, this trend sparks an increased reliance on high-ratio, heavy-wall, adhesive-lined tubings. Modern applications demand tighter dimensional tolerances to prevent short circuits in high-voltage environments. Exact wall thickness is no longer just a recommendation. It is a strict compliance requirement to prevent arc tracking and thermal degradation over decades of continuous use.
Understanding the thermal properties of your materials is just as critical as measuring dimensions. When evaluating specifications, technicians must differentiate between two distinct temperature metrics. Confusing the shrink temperature with the operating temperature leads to catastrophic failure in electrical systems.
The shrink temperature refers to the specific amount of thermal energy required to activate the cross-linked polymers. This causes the tube to recover. It is usually divided into a minimum shrink temperature, where contraction begins, and a full recovery temperature. The full recovery temperature provides the optimal heat for maximum shrinkage and adhesive melting.
Conversely, the operating temperature defines the environmental conditions the tubing can safely withstand over its continuous lifespan. High-quality products are engineered to maintain their dielectric strength in environments ranging from -55°C to 135°C. This ensures the material will not become brittle in freezing conditions or melt under engine heat.
Applying heat improperly is a leading cause of installation failure. While open flames like lighters are sometimes used in emergency field repairs, they are highly discouraged for professional applications. Open flames create concentrated hot spots. These spots scorch the tubing and degrade the polymer structure.
The industry standard tool is a variable-temperature heat gun equipped with a reflector nozzle. This nozzle wraps the hot air around the entire circumference of the tubing, promoting even shrinkage. When applying heat, always start from the center of the tubing and work outward toward the edges. This sweeping technique pushes trapped air out of the ends, preventing bubbles and ensuring a watertight seal.
Using a digital caliper, determine the maximum diameter of the object you need to cover. The wire insulation tubing you select must have an expanded diameter that is at least 10 to 20 percent larger than this measurement. If it is too tight before heating, it will likely tear as you attempt to slide it over the joint.
Next, measure the diameter of the actual cable extending from the connector. This represents the smallest dimension the tubing must grip tightly. The tubing's recovered diameter must be smaller than this measurement. This guarantees adequate strain relief and protection against dust.
The disparity between your two measurements dictates the required shrink ratio. If the widest part is 6mm and the narrowest is 3.5mm, a standard 2:1 ratio works perfectly. If you are covering a 12mm connector to seal a 3mm wire, you will need a 4:1 ratio.
Assess your environment carefully. Use thin-wall for indoor flexibility. Switch to heavy-wall adhesive-lined tubing for underground or marine environments to prevent water ingress.
A frequently overlooked factor is longitudinal shrinkage. When heated, the tubing does not just shrink in diameter. It also contracts slightly in length, typically ranging from 5 to 7 percent. To compensate for this physical property, always cut your tubing slightly longer than the actual length of the area you intend to cover.
Navigating wire gauges and metric measurements can be challenging. In electrical engineering, conductors are frequently sized using the American Wire Gauge standard. Shrinkable sleeves are categorized by metric diameter or fractional inches. Bridging this gap requires accurate conversion data.
Keep in mind that the insulation thickness of the wire itself can vary based on its rating. The following chart represents average outer diameters for standard stranded electrical wires.
AWG Size | Approximate Wire O.D. (mm) | Approximate Wire O.D. (Inches) | Recommended Tubing Size (Expanded) |
|---|---|---|---|
22 AWG | 1.6 mm | 0.06 in | 2.4 mm |
20 AWG | 1.9 mm | 0.07 in | 3.2 mm |
18 AWG | 2.1 mm | 0.08 in | 3.2 mm |
16 AWG | 2.4 mm | 0.09 in | 4.8 mm |
14 AWG | 2.7 mm | 0.11 in | 4.8 mm |
12 AWG | 3.4 mm | 0.13 in | 6.4 mm |
10 AWG | 4.0 mm | 0.16 in | 6.4 mm |
8 AWG | 5.5 mm | 0.22 in | 9.5 mm |
4 AWG | 8.0 mm | 0.31 in | 12.7 mm |
1/0 AWG | 12.0 mm | 0.47 in | 19.1 mm |
The 2:1 shrink ratio is the most commonly utilized specification for general insulation. Adhering to the 80/20 rule discussed earlier, ensure your target object falls comfortably between the expanded and recovered numbers.
Nominal Size (Inch) | Nominal Size (mm) | Minimum Expanded I.D. (mm) | Maximum Recovered I.D. (mm) | Typical Applications |
|---|---|---|---|---|
1/16" | 1.6 mm | 1.6 mm | 0.8 mm | Micro-electronics, fiber optics |
3/32" | 2.4 mm | 2.4 mm | 1.2 mm | 22-18 AWG wire splices |
1/8" | 3.2 mm | 3.2 mm | 1.6 mm | 18-14 AWG wire splices |
3/16" | 4.8 mm | 4.8 mm | 2.4 mm | 14-12 AWG, small connectors |
1/4" | 6.4 mm | 6.4 mm | 3.2 mm | 12-10 AWG, automotive wiring |
3/8" | 9.5 mm | 9.5 mm | 4.8 mm | 8 AWG, coaxial cables |
1/2" | 12.7 mm | 12.7 mm | 6.4 mm | 4 AWG, battery cables |
3/4" | 19.1 mm | 19.1 mm | 9.5 mm | 1/0 AWG, heavy machinery |
1" | 25.4 mm | 25.4 mm | 12.7 mm | Large bundles, tool handles |
Mastering this sizing guide ensures that your electrical projects remain safe, durable, and professional. Success ultimately comes down to measuring both the expanded and recovered diameters accurately every single time. By selecting the correct shrink ratio for your specific application and pairing it with the proper wall thickness, you guarantee long-lasting durability even in the harshest environments. Precise measurements prevent loose fits and dangerous exposed wires. Accuracy matters just as much for standard indoor repairs as it does for heavy-duty outdoor installations. Review your project requirements carefully, utilize the conversion charts provided, and choose the right specifications to safeguard your wiring today.
Ready to upgrade your cable management and ensure maximum safety for your electrical systems? Explore the full range of professional-grade solutions at CHS Plastics to find the exact specifications your next project demands.
While it is technically possible in a pinch, using a lighter or open flame is highly discouraged by electrical engineers. Lighters provide uneven, highly concentrated heat that can easily exceed the material's maximum temperature threshold. This causes the polymer to burn, melt, or become brittle. It completely compromises the structural integrity of the insulation. For professional, reliable results, always use a variable-temperature heat gun with a reflector nozzle to ensure even, controlled heat distribution.
Selecting an oversized tube is a critical error. If the tubing's maximum recovered diameter is larger than the outer diameter of your wire, the material will never grip the cable tightly. This holds true regardless of how much heat you apply. It results in a loose fit that allows the tubing to slide back and forth. Consequently, the installation fails to provide strain relief, fails to protect against mechanical abrasion, and leaves the splice completely vulnerable to moisture and dust.
Yes, this physical phenomenon is known as longitudinal shrinkage. Due to the molecular cross-linking process used during manufacturing, the tubing contracts in length as it recovers its original diameter. For most standard materials, this lengthwise reduction ranges between 5 and 7 percent. If you cut the tubing exactly to the length of the exposed wire before heating, the ends will pull back during installation, leaving bare wire exposed. Always calculate this percentage and cut your tubing slightly longer.
Adhesive-lined tubing is required whenever the electrical connection will be exposed to harsh environmental factors. When heated, the inner layer of thermoplastic adhesive melts and flows into the microscopic voids between the wire and the connector. It forms a rigid, waterproof, and airtight seal upon cooling. You must use adhesive-lined tubing if your application is outdoors, buried underground, submerged in a marine environment, or located in an automotive engine bay where it must resist corrosive fluids and extreme vibrations.
Splitting usually occurs for three reasons: selecting an undersized tube, leaving sharp edges on the soldered joint, or applying uneven heat. To prevent this, always ensure the expanded diameter is 10 to 20 percent larger than the connector. File down any sharp solder spikes before sliding the sleeve over the joint. Finally, use a heat gun with a reflector nozzle to apply heat evenly, starting from the center and sweeping outward.
Both materials excel in different environments. Polyolefin is the general industry standard because it handles extreme temperature swings and resists harsh chemicals effectively. However, PVC is often preferred for applications requiring high clarity, superior rigidity, and lower shrink temperatures. High-grade PVC tubing also offers excellent flame retardance, making it highly effective for specific indoor and automotive applications.

